Self-cleaning ovens make kitchen cleanup a lot easier—you don’t have to spend hours scrubbing with harsh chemicals. These ovens heat up to 800°F–1,000°F, turning baked-on spills into fine ash that you wipe away once the cycle is done. They’re designed to handle these extreme temperatures safely, but you may notice some smoke or odor, and a full cycle can take between 3.5 and 6 hours, depending on the model.
In this guide, we’ll cover how self-cleaning ovens work, best practices to keep them safe, step-by-step instructions for running a cycle, natural cleaning alternatives, FAQs, and when it’s best to call a professional.
How Does a Self-Cleaning Oven Work?
Self-cleaning ovens work by burning off food residue using very high heat—a process called pyrolytic cleaning.
- The oven locks automatically for safety.
- Heat rises to extreme temperatures, turning spills into fine ash.
- Once cooled, the ash can be wiped out with a damp cloth.
Some models also include a steam-clean cycle, which uses water and lower heat to loosen light messes between deep cleans. Whether you own a wall oven or a freestanding range, always check the self-cleaning feature instructions in your manual.
Pet owners note: Animals have more sensitive noses than humans. Always ventilate well and keep pets out of the kitchen during a self-clean cycle.
The information in this blog is referenced from official brand sources such as Maytag and KitchenAid. Our goal is to provide customers with content that meets their needs while ensuring accuracy and authenticity.
Types of Self-Cleaning Ovens
Not every self-cleaning oven operates in the same manner. Here are the main types:
- Pyrolytic Ovens
- Heats to around 900°F (500°C).
- Burns food and grease to ash.
- Deepest, most thorough clean but energy-intensive.
- Catalytic Ovens
- Feature liners that absorb grease while cooking.
- Residue breaks down during normal high-heat cooking.
- Good for light kitchen maintenance, but not a full clean.
- Steam-Clean Ovens
- Use water + lower heat to soften grime.
- Quicker and gentler than pyrolytic, but best for light soils.
Self-Cleaning Oven Best Practices
| DO | DON’T |
| Keep the kitchen well-ventilated (open windows, run the fan, don’t block the oven vent). | Don’t use commercial chemical cleaners inside the cavity. They can damage the enamel. |
| Remove oven racks, cookware, foil, and pans before running the cycle. | Don’t try to open the oven until it has fully cooled. |
| Wipe out crumbs and big spills first to reduce smoke. | Don’t let children or pets stay near the oven while it runs. |
| Clean the oven door glass before starting—grease can bake on and leave stains. | Don’t block the vents—airflow is essential. |
Note: If your oven has a steam-cleaning feature, it’s a safe, low-heat alternative for quick cleanups.
How to Work a Self-Cleaning Oven (Step by Step)
Supplies:
- Damp cloth or sponge
- Mild dishwashing liquid soap
- Vinegar (optional for wiping afterward)
Step 1: Remove Items and Wipe Down
- Take out oven racks, broiler pans, foil, or cookware.
- Wipe loose crumbs with a damp cloth.
- Clean the oven door glass in advance to prevent stains.
Step 2: Start the Self-Clean Cycle
- Close the oven door completely so the lock engages.
- Select your cycle time (longer for heavy soils, shorter for lighter messes).
- Once started, the oven locks for safety.
Step 3: Let the Cycle Run and Cool Down
- Please expect the door to remain locked until the oven has cooled completely.
- Displays may show “Clean,” “On,” or “Locked.”
- Popping or crackling noises inside are normal.
Step 4: Wipe Out Ash
- Once cooled, wipe away ash with a damp cloth or sponge.
- If scrubbing is necessary, use mild cleaners such as dish soap or diluted vinegar.
How to Clean Your Oven Naturally (No Harsh Chemicals)
Prefer a gentler method or want to avoid high heat? Baking soda and vinegar are effective alternatives.
- Remove oven racks and accessories.
- Mix ½ cup of baking soda with 2–3 tbsp of water into a paste.
- Spread the paste on the oven interior (avoid heating elements and the door gasket).
- Let it sit overnight to break down grease.
- Clean racks separately with warm, soapy water.
- Wipe out dried paste with a damp cloth.
- Spray vinegar on the residue—it will foam and lift off.
- Final wipe-down with a clean cloth.
This method is slower but produces no harsh fumes and is safe for older ovens.
Cleaning a Self-Clean Oven Manually
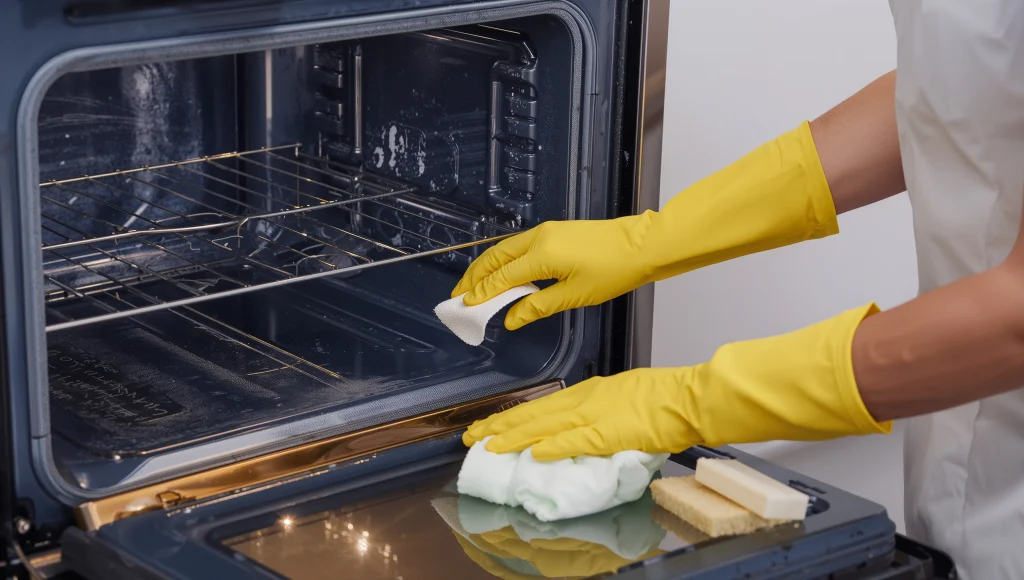
Even with a self-cleaning cycle, some areas may still require manual oven cleaning.
- For light soil:
- Mix warm water + dishwashing liquid soap.
- Wipe with a cloth or sponge.
- For stubborn spots:
- Use a plastic scrub pad gently (avoid powders).
- Place ½ cup of ammonia in a glass dish in a cold oven overnight to loosen grime (never turn the oven on with ammonia inside).
- Apply a non-abrasive cream cleanser or a liquid soft cleanser with a sponge if needed.
- Rinse well:
- Always rinse thoroughly to prevent staining during the next self-clean cycle.
How Long Does a Self-Cleaning Oven Take?
Most ovens run 2–6 hours, depending on the setting and soil level: heavy soils = longer cycles, more odor, and more smoke. Wiping spills right away helps shorten future cycles.
Can I Stop a Self-Clean Cycle Early?
Yes, most ovens let you cancel mid-cycle. But the oven door won’t unlock until the interior cools down. Never try to force it open—this can damage the lock or seals.
How Often Should I Use Self-Clean?
It depends on how often you cook:
- About every 3–6 months is common.
- Don’t wait until it’s heavily soiled—that creates excessive smoke.
- Wipe spills quickly to reduce the need for deep cleans.
Can I Use Cleaners in a Self-Clean Oven?
Avoid harsh oven cleaners—they can damage the enamel and release fumes. Instead, use:
- Baking soda + water paste
- Diluted vinegar
- Mild dish soap
Always check your manual first.
Tips for Getting the Best Results
- Don’t leave the house while the cycle is running.
- Ventilate with a fan or open windows.
- Check racks—most need to be hand-washed.
- Inspect door seals regularly to ensure heat stays inside.
- Keep a fire extinguisher nearby for peace of mind.
Pros and Cons of Self-Cleaning Ovens
Pros:
- Saves time and effort
- No harsh chemicals required
- Cleans hard-to-reach areas
Cons:
- Smoke and odors during cleaning
- Uses more energy than manual methods
- Racks usually need separate cleaning
- May not remove every single stain
Self-Cleaning vs. Professional Oven Cleaning
| Feature | Self-Cleaning Oven | Professional Oven Cleaning |
| Chemical-Free | ✅ | ✅(Eco-friendly options) |
| Deep Glass Panel Cleaning | ❌ | ✅ |
| Rack & Grill Cleaning | ❌ | ✅ |
| Smoke-Free | ❌ | ✅ |
| Effort Required | Medium | Low (handled by experts) |
A self-clean cycle is great for routine maintenance, but for deep, spotless cleaning—especially stains between glass panels or stubborn grease—professional cleaning is the way to go.
FAQs About Cleaning a Self-Cleaning Oven
No. Harsh chemical cleaners can damage the oven’s enamel coating and interfere with the self-clean cycle. Instead, use mild options like a baking soda paste, diluted vinegar, or dish soap.
It’s not recommended. Self-cleaning cycles run at very high heat for several hours, which can produce smoke or odors. Always run the cycle when you’re at home and keep the kitchen well-ventilated.
The smell usually comes from burning food residue, grease, or spilled oils. Ventilate your kitchen well and wipe up big spills before starting a cycle to reduce odors.
Most ovens need a self-clean cycle every 3–6 months, depending on how much you cook. For best results, wipe up spills immediately so the oven doesn’t become heavily soiled.
Yes, but keep kids and pets out of the kitchen during the cycle. The oven gets extremely hot, and odors can irritate sensitive noses. Always ventilate the room.
Don’t force it open—the lock will release once the oven cools completely. If it stays locked even when cool, you may need professional service.
Conclusion
Self-cleaning ovens are a huge time-saver, but they need to be used correctly to avoid damage. By following best practices, ventilating well, wiping spills quickly, and knowing when to use natural alternatives, you can keep your oven safe and spotless
And if your oven smokes excessively, the door won’t unlock, or the self-clean function stops working—don’t take risks. Call the experts at Neighborhood Appliance Repairs. We’ll ensure your oven is clean, safe, and functioning like new—so you can focus on enjoying your kitchen. For fast and reliable service, check out our Oven Repair Service page
Want more tips? Check out our detailed guide: Samsung Oven Not Heating? Here’s How to Fix It

